 Video Project
 Video Project
Digital storytelling can be a powerful resource for learning as it helps students develop visual, information and digital literacies. Engaging students in the production of digital stories or other video genres can captivate and motivate students to learn more in-depth about the subjects they study. It also promotes collaborative learning, creative expression, individual reflection, higher-order thinking skills, and other fundamental skills cited in the ISTE-S as being necessary to thrive in modern times.
Create an example of the type of video you would challenge your students to create. You will go through the process of making the video pretending that you are a student in your classroom. The content will be based on objectives described in your planned thematic unit. Watch a variety of examples, then follow the process outlined below.
 Examples
 The video should support one of the instructional objectives from your thematic unit and also align with InTASC 1, 3, 5, and 8. Follow the Reflection Guidelines to successfully complete this aspect of your assignment.
Imagine how your students might create a digital video to support their own learning within the thematic unit. This type of project-based learning activity could actively engage students through active inquiry and demonstrate their mastery of content. Challenging your students to develop a digital story can motivate them to research a topic and demonstrate their learning through a fun and creative medium.
How might students be compelled or motivated by a short story? Why might you challenge students to make their own video? How could you engage students and motivate them to develop a deeper understanding of subject matter? The message concept might be informational, motivational, instructional, persuasive, reflective, etc. The process could involve the cognitive domain (knowledge, higher-order thinking), affective domain (attitudes, opinions, values, emotion), or psycho-motor domain (motor skills, speech development, reading readiness, physical movement).
For this assignment, consider creating the video as if you are the student (or group of students). Create the type of video that you envision your future students would be inspired to create. It should demonstrate some aspect of their learning with regard to the thematic unit and be an example of how you imagine engaging students with technology in your future classroom.
After reviewing the goals and objectives for your thematic unit and generating a rough idea for this project, begin writing a narrative script. Focus! You have only a few minutes to clearly communicate the message, tell a story, and make an impression. The script provides the underlying narrative, whether it will be a spoken narration or a narrative told through text on screen. The script should take between 1–3 minutes to read at a relatively slow pace. Be prepared to share and discuss your script with a peer.
List of Ideas for Digital Storytelling Across the Curriculum
 Once you have composed a narrative for the digital story, further refine your plan by developing a storyboard. Follow the production process outlined below. Download the storyboard template and print as many pages as necessary to plan your video.
![]() Storyboard Template
Storyboard Template
The creation of a storyboard is a standard practice employed by creative professionals, and it will make the development process more efficient. Be prepared to share and discuss your storyboard with a peer.
| Preproduction | Production | Post production |
|---|---|---|
|
|
|
Gather all assets (images, audio, and video clips) in the same folder and keep all related files organized this way in a single folder just for your video project. This allows you to back up your project or move it to another computer, if necessary. Avoid having files related to the project scattered about in different places on your computer.
You may use your own digital camera to take pictures or perhaps even record short video clips–many digital cameras have this feature. Your cell phone might even record pictures or video. However, verify that you know how to transfer pictures and video from your device to the computer before you spend too much time capturing original footage. Take a few moments to test this process with your equipment and confirm that things work as expected.
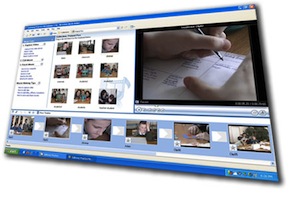
You can use WeVideo (online), iMovie (Mac), Windows Live Movie Maker, or discuss with the instructor other video editing software to create your video. See Resources below for links to tutorials. PowerPoint alone or other slide show apps are not sufficient for producing your video project.
Download WeVideo for your mobile device
Many links are provided below under Resources to sites where you can search for assets for your project (pictures, video clips, sound effects, music). You are not required to capture original content, and we encourage you to explore these links in your search for assets. However, you will be expected to strictly adhere to Copyright law and Creative Commons licenses. Because you are required to upload your completed video project to the web, you may not use any media under the terms of fair use. Fair use does not apply to this project, because you will be distributing your video to a wide audience via an unrestricted web site (YouTube or WeVideo).
As you search for images, audio or video clips, locate the terms of use for any media that you intend to download and use in your project. Any image, audio or video clip taken from a source other than your own is subject to the copyright of its owner. Refer to the RWLDs and lecture topic Copyright, Fair Use & Creative Commons for more information. Visit with your instructor if you have additional questions.
1. If your project is created in WeVideo you can publish it there for free or you can elect to pay to upload it to YouTube. We do not require YouTube submission. However, YouTube is more popular video sharing platform, and if you want the world to benefit from your creativity, consider posting your video there.
2. Ensure that your video is public, not private. Allow plenty of time for the upload process to complete. This may take a long time, depending on your internet connection.
WeVideo, iMovie, and Windows Live Movie Maker allow you to upload your finished video directly to YouTube. However, you must subsequently login to the YouTube web site to add additional information to the video (description, category, tags, etc. as directed above). Versions of Windows Movie Maker older than Windows Live Movie Maker do not export directly to YouTube. One must export the video to WMV Format then upload that exported file to YouTube. Contact your instructor if you need additional support.
3. Once your video has been uploaded, go to the page where your video plays. Confirm that everything works okay, and then copy and paste the URL from the address bar to the required submission place:
INSTTECH 1031 sections:
Submit the video URL to the completed video artifact page in your ePortfolio. If you submitted your video to YouTube, we suggest embedding your video on the artifact page of your ePortfolio in lieu of a screen capture. Copy the URL of your video artifact page and paste in eLearning assignment submission dropbox. Do not attach any files to your eLearning submission.
Secondary majors enrolled in the INSTTECH 1020 course Submit the URL and reflections in the eLearning assignment submission box, because you do not create an ePortfolio.
| Criteria | Points Possible |
|---|---|
Reflection
|
15 |
Content
|
32 |
Story Development
|
25 |
Visual Design and Law Abidance
|
20 |
File Management
|
8 |